


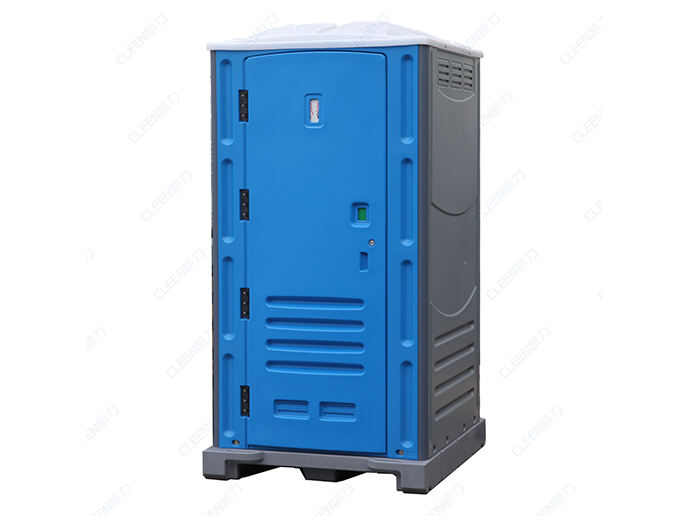
A portable toilet needs to be successfully assembled as well for improved user experience. It does not matter if you are organizing an event or maybe working a construction task - offering enough sanitation comfort is vital. HDPE portable toilets and other types of portable loos are ideal for this application, since they provide a sturdy means to go as well as being easily carried from place to place. We outline how you can put together an HDPE toilet step by step in this guide.
HDPE Portable Toilet Assembly Process Step-by-Step
This is a simple project that can be completed on your own without the help of professionals with minimal effort required in assembling HDPE Portable Toilets. Strictly adhere to the following steps for a frictionless assembly experience.
Step 1: Unpacking Materials : unpack the seat, bowl and tank of your portable toilet
Step 2: PUT THE BOWL ON TOP OF THE TANK, MAKE SURE IT FITS WELL (TO AVOID LEAKAGE DURING USE) AND ADD ONE NUT TO SECUREPLEMENT NOW YOU HAVE YOUR NEW PORTABLE COMMODE PLACE SMARTY-CARTUSE. After alignment, fix the bowl with some retaining nuts to tank.
Step 4: Attach the Containers -> Set up your flashing container on top of the tank and place each waste vessel under the bowl. Positioning right will be important to allow disposal of the waste effortlessly.
Toilet Seat Attachment: Slide the toilet seat onto bowl and attach it into place by tightening screws that will stabilize so there is no wiggle room.
Complete the Assembly - Make Sure All Hardware is affixed securely to provide stability and usability for your portable commode.
How to Build Your Own Portable HDPE Toilets
It takes a bit more than just simply setting up the toilet when you plan on building your HDPE portable restroom. How to make a perfectly-working, portable toilet:
Step 1: Putting it togetherBegin assembling your toilet as previously described.
Installation of Roof: Fix the roof onto the walls with hinges, screws and latches that seal securely against wall plates
Door Installation: Fit the door you want (again with hinges if needed) - make sure it moves freely and locks from the inside.
Ventilation and Windows: You can introduce a ventilation system if you wish or have windows added into the opposite walls for fresh air to move in as well natural light.
Load Up on Necessary Goods: Get the basic products you will need to add like bathroom tissue, hand sanitizer and soap dishes for a working sink.
How to Best Assemble HDPE Portable Toilet
Flat Surface: Working at a place where is flat can prevent caking and also prevents the lid of falling over when you use it.
Employ the Right Tools: You should strictly work with what are known as tools to prevent harming materials in addition to make for easy assembly.
Ask For Help: When another individual will help you, it's less probable that incidents occur and to make the process of assembling easier.
Location: Make sure your portable restroom is in a safe and well-maintained place with access to proper waste removal.
Preparation -follow Manufacturer's Instructions: Following the instructions of manufacturer is very important to avoid common mistakes and make a successful assembly.
HDPE Portable Toilet Assembly - Mistakes to Avoid
Do not overtighten: Overtorqued hardware can cause stress and damage, so make sure things are snug but do not be too aggressive on the wrench.
Stability: Install the toilet on a level surface to prevent wobbling or rocking that contribute to bending and breaking corners.
Proper Tools: You must use the right tools that are recommended to prevent your materials from being damaged.
Place Waste Container Properly - Poor alignment of the waste container will cause blockages and overflow as well.
Not Installing Ventilation System - Another common mistake is forgetting to keep the restroom airy, without ventilation unpleasant smell start coming out from it making uncomfortable for users.
Tips, tricks and expert advice of HDPE Portable Toilet Assembly with minimal time interval
Follow Manufacturer's Directions: Make sure to read the directions provided by the manufacturer for easy assembly.
Ideal Work Setting ^^^^ Keep work area well-lit, and have good ventilation for comfort and productivity as you assemble.
Materials in one spot - have all of the materials you need together, make it as easy and quick to grab things while putting everything together.
Make Use of multiple Tools: Try using a cord-less drill for faster material assembly, which is an experience!
Collaborator: Work with an Assistant A second pair of eyes can help expedite the assembly process and overall operational efficiency.
In summary, putting together your HDPE portable toilet is a simple and rewarding process if you follow the correct steps using proper tools while keeping perfectionist mind. Providing a clean and safe toilet that saves costs can be done with appropriate guidance. Avoid some mistakes: follow the manufacturer's instructions, and learn from other's hard experience in putting this stuff together for a simple assembly process.

